Today, I will share how you can install Flarum on Cloudways. Before that, let’s discuss a little bit about Flarum and its requirements.
About Flarum
Flarum is the next-generation forum software that is simple and elegant. Flarum is completely free and open-source.
Due to its immense potential, I won’t be surprised if it gets as popular as WordPress in the future.
Even it is the best Discourse alternative I have ever come across.
Some key points that make Flarum so unique:
- Elegant UI
- Touch-Optimized
- Fast & Lightweight
- Easy Installation
- Extensible Architecture
- Themeable
- Smart Notifications
- Tags
- Replies & Mentions
- Powerful Permissions
Some of our users asked us how they can install Flarum on Cloudways. It is really easy since Cloudways has everything that Flarum requires.
Flarum Requirements
- PHP 7.2.9+ with the following extensions: curl, dom, gd, json, mbstring, openssl, pdo_mysql, tokenizer, zip
- Apache (with mod_rewrite enabled) or Nginx
- MySQL 5.6+ or MariaDB 10.0.5+
- SSH (command-line) access to run Composer
With Cloudways, you don’t need to set up any of the requirements manually. As soon as you launch a server, everything comes ready out of the box.
Even I use and recommend Cloudways to anyone who wants to start a blog.
If you have ever wanted to install Flarum on DigitalOcean or Vultr or Amazon Web Services or Linode or Google Cloud, then Cloudways can make things easy.
You can get free $10 credits using our exclusive Cloudways coupon if you want to give it a try.
Without further ado, let’s get started with the tutorial.
Install Flarum Forum on Cloudways
It is a five-step process with all the steps mentioned below.
- Step 1: Deploy Server & Application
- Step 2: Launch SSH Terminal
- Step 3: Install Flarum
- Step 4: Change WEBROOT
- Step 5: Configure & Finish Flarum Installation
Step 1. Deploy Server & Application
After logging into your Cloudways account, launch a new server with a Custom PHP application.
The entire process is illustrated using the GIF below.
In case you already have a Cloudways server, simply add a new Custom PHP application to it.
Step 2. Launch SSH Terminal
Once your application is live, go to the Master Credentials page of your server and click Launch SSH Terminal.
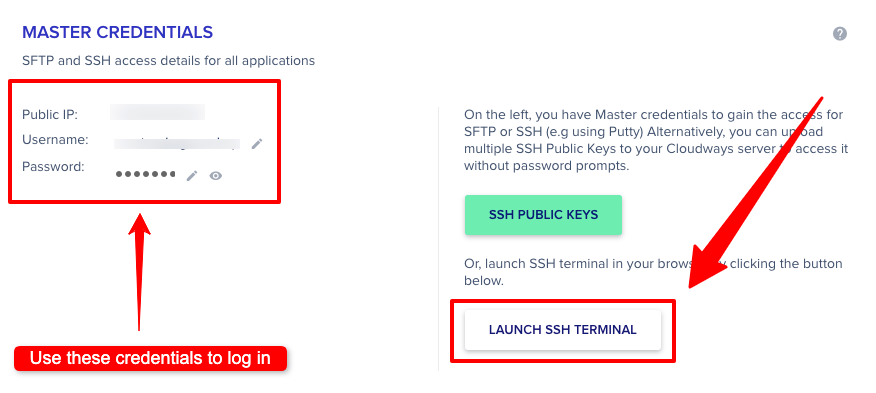
Use the SSH access details provided on the Master Credentials page to log in. Once logged in, keep the tab open.
Step 3. Install Flarum
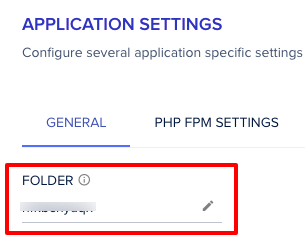
Go to the Application Settings of the Custom PHP application you just installed on your server. There you will find the Folder name. Simply copy it.
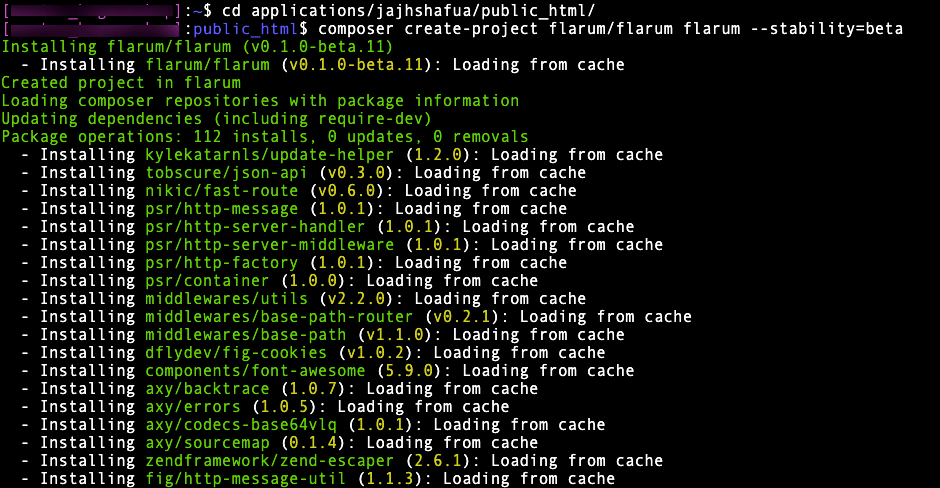
Now, go back to the SSH Terminal tab and run this command:
cd applications/jajhshafua/public_html/
Replace jajhshafua in the above command with the application folder name you copied in the previous step.
Then run the following command to Install Flarum on your Cloudways server:
composer create-project flarum/flarum flarum --stability=beta
Flarum installation process will begin:
Once the process completes, it is time to set up the Flarum forum and finish the installation.
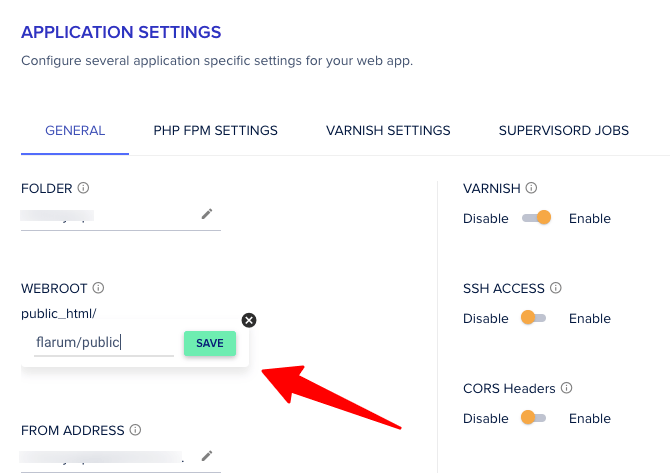
Step 4. Change WEBROOT
Go to the Application Settings of your Custom PHP app for Flarum and add the following path to the WEBROOT: flarum/public and click Save.
Step 5. Configure & Finish Flarum Installation
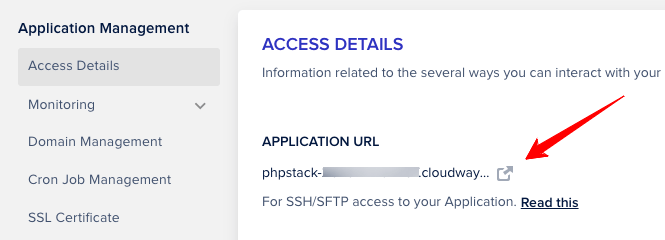
Once the Flarum is downloaded on your Cloudways server, it is time to finish the installation and configure it.
Launch the app using the link on the Application Access Details page:
The Flarum forum installation page will open that will look like this:

Enter the MySQL details from the Application Access Settings of your Flarum Custom PHP app.
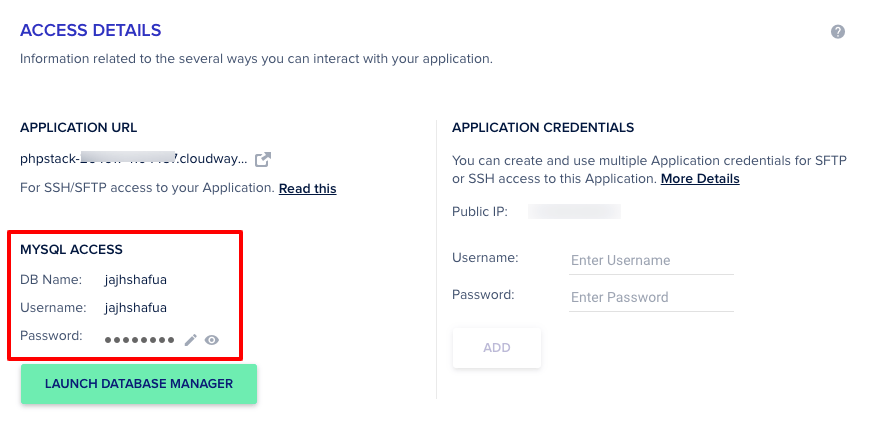
After filling up all the details, click Install Flarum.
The process can take a few minutes. But it is mostly instant. Finally, once the operation finishes, you will see this page:
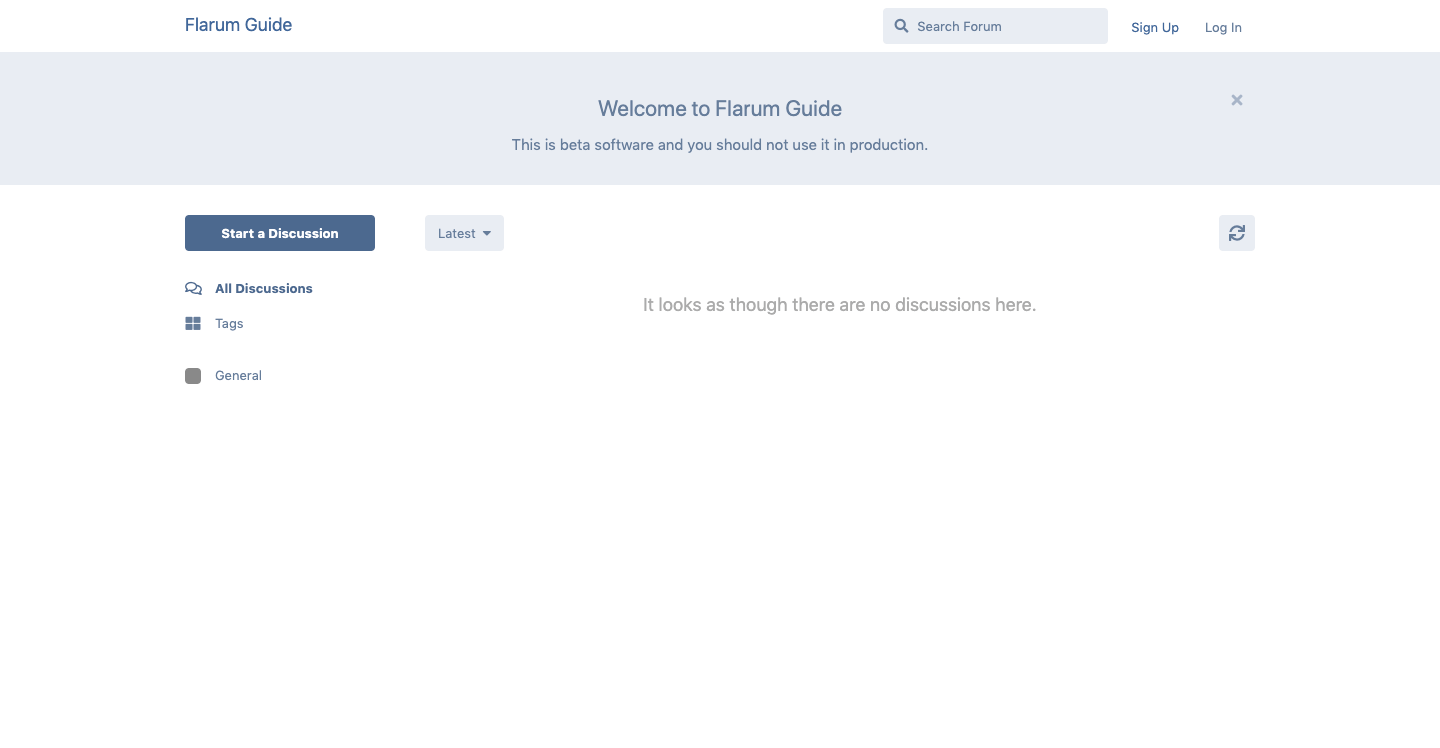
Congratulations! You have successfully installed Flarum on Cloudways. You can see the live demo of the Flarum forum I installed after following this guide.
Troubleshooting
Below are some common issues that people experience after or during Flarum installation. I’ve also mentioned their fixes.
CSS & JS not loading
If your installed site looks broken, then that’s probably because the CSS and JS cache couldn’t be generated properly.
To fix this issue, log in to your master server through SSH and go to the Flarum installation directory, as mentioned in Step 3.
Then enter the following command:
php flarum cache:clear
If the command returns any permission error, then go to Application Settings in Cloudways and reset permission.
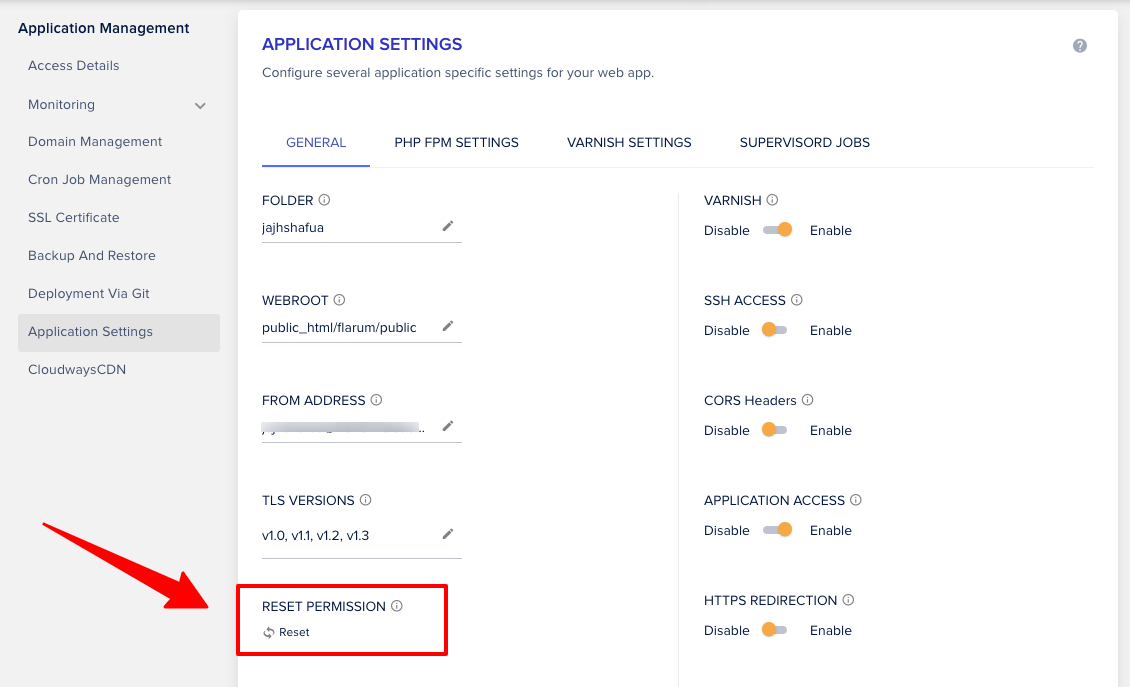
Now retry entering the clear cache command, and it should work fine.
Fixing 403 Forbidden Error
This error commonly occurs when the WEBROOT path is wrong. Make sure you add the right path from Step 4.
CSS & JS not loading after adding the domain name
Some people have reported this issue that CSS and JS stopped loading after a domain is added to the Cloudways app for Flarum.
The forum will load in a plain HTML with no style or animations.
It is because Cloudways only adds and updates the site’s domain in the virtual hosts file.
As a result, even though your forum is live and loads perfectly through the domain, the static assets like CSS and JS will still load through the application address that Cloudways provides you.
To fix this issue, go to the application’s Access Details and set SSH/SFTP credentials there.
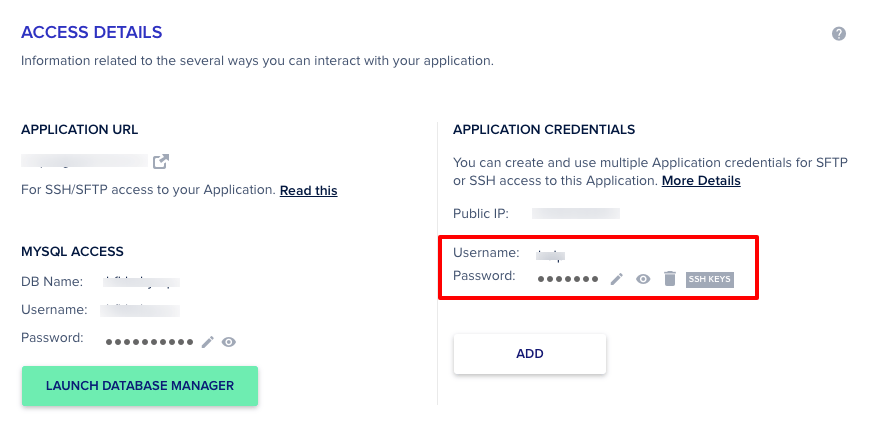
Then, download an SFTP client like FileZilla and login to your application using the SFTP credentials you just created.
Navigate to public_html » flarum and open the config.php file. You will see it still has the Cloudways’ application address in the URL.
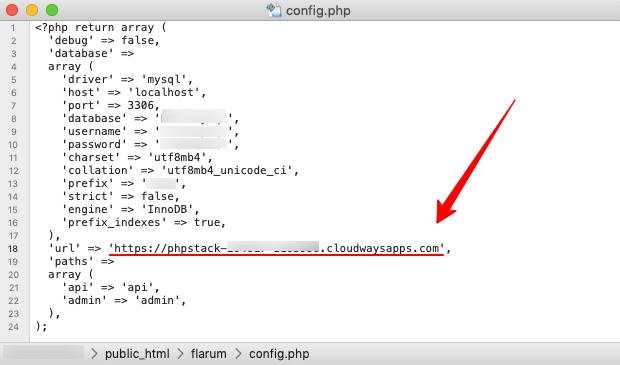
Replace the URL with your new domain address. Save it and reload the forum. It should load fine.
Frequently Asked Questions
If you need any help related to this entire process, then feel free to drop a comment below. I will try to help you as soon as possible. Cheers!